Introducing the Google Web Toolkit
By Brad Busch, OCI Software Engineer
October 2006
Overview of GWT 1.1.0
The Google Web Toolkit (GWT) is a unique entry among AJAX toolkits in that it is built for Java developers who may not know the latest web coding standards, but want to harness the power of AJAX. Until now, AJAX toolkits or frameworks have consisted of Javascript widget libraries and implementing them involved detailed knowledge of Javascript, HTML and CSS. With GWT's Java-centric approach, much of the pain has been removed with Swing-like creation of the front-end code, real debugging from within your favorite IDE and guaranteed cross-browser support.
Getting started with GWT
The GWT download comes with two scripts: projectCreator and applicationCreator.
The projectCreator script can be thought of as an Eclipse project creator as it is used to create an application directory, Eclipse classpath and project files. All output is highlighted.
- ${path_to_gwt}/projectCreator -eclipse SimpleHelloWorld -out SimpleHelloWorld
- Created directory SimpleHelloWorld/src
- Created directory SimpleHelloWorld/test
- Created file SimpleHelloWorld/.project
- Created file SimpleHelloWorld/.classpath
The applicationCreator script generates a src/ directory, a moduleName-compile script and an moduleName-shell script. I use the convention of 'moduleName' here to denote that GWT refers to an application as a module. The src/ directory is comprised of the package name given during creation, some stubbed out classes and an XML file in the form of moduleName.gwt.xml. This XML file marks the entry point to the application. The compile script sends all class files and generated JavaScript to the www/ directory. The shell script is used for debugging purposes and launches a GWT embedded browser that is actually executing Java bytecode — this is generally known as Hosted mode. Support for hosted mode is currently only available for Windows and Linux users; however, there are rumors of an OS X version on the horizon.
The output from using the applicationCreator script looks like this:
- ${path_to_gwt}/applicationCreator -out SimpleHelloWorld
- com.ociweb.client.SimpleHelloWorld
- Created directory SimpleHelloWorld/src
- Created directory SimpleHelloWorld/src/com/ociweb
- Created directory SimpleHelloWorld/src/com/ociweb/client
- Created directory SimpleHelloWorld/src/com/ociweb/public
- Created file SimpleHelloWorld/src/com/ociweb/SimpleHelloWorld.gwt.xml
- Created file
- SimpleHelloWorld/src/com/ociweb/public/SimpleHelloWorld.html
- Created file
- SimpleHelloWorld/src/com/ociweb/client/SimpleHelloWorld.java
- Created file SimpleHelloWorld/SimpleHelloWorld-shell
- Created file SimpleHelloWorld/SimpleHelloWorld-compile
Modules
Modules are the configuration files within the GWT framework that define the entry point to the application. A single GWT module consists of an XML file that binds the necessary files for a given GWT function. Module definitions are flexible; they allow for inheritance, Javascript and CSS injection, package filtering, resource path configuration and multiple modules - as long as they are compiled separately.
SimpleHelloWorld
Below is the generated SimpleHelloWorld.gwt.xml file. By default, modules denote one entry point and inherit from the User module.
- <module>
- <!-- Inherit the core Web Toolkit stuff. -->
- <inherits name='com.google.gwt.user.User'></inherits>
-
- <!-- Specify the app entry point class. -->
- <entry-point class='com.ociweb.client.SimpleHelloWorld'></entry>
- </module>
Here is the client java class (SimpleHelloWorld.java) that will be converted into Javascript. While this code is a bit trivial, it demonstrates some basic concepts of GWT GUI building. See the comments inline with the source.
- package com.ociweb.client;
-
-
- import com.google.gwt.core.client.EntryPoint;
- import com.google.gwt.user.client.ui.Button;
- import com.google.gwt.user.client.ui.ClickListener;
- import com.google.gwt.user.client.ui.Label;
- import com.google.gwt.user.client.ui.RootPanel;
- import com.google.gwt.user.client.ui.Widget;
-
-
- /**
- * Entry point classes define <code>onModuleLoad()</code>.
- */
- public class SimpleHelloWorld implements EntryPoint {
-
-
- /**
- * This is the entry point method and MUST be implemented.
- */
- public void onModuleLoad() {
-
- final Button button = new Button("Click me");
- final Label label = new Label();
-
-
- button.addClickListener(new ClickListener() {
-
- public void onClick(Widget sender) {
- if (label.getText().equals(""))
- label.setText("Hello World!");
- else
- label.setText("");
- }
- });
-
-
- /*
- Assume that the host HTML has elements defined whose
- IDs are "slot1", "slot2". In a real app, you probably would not
- want to hard-code IDs. Instead, you could, for example, search for
- all elements with a particular CSS class and replace them with widgets.
- */
- RootPanel.get("slot1").add(button);
- RootPanel.get("slot2").add(label);
- }
- }
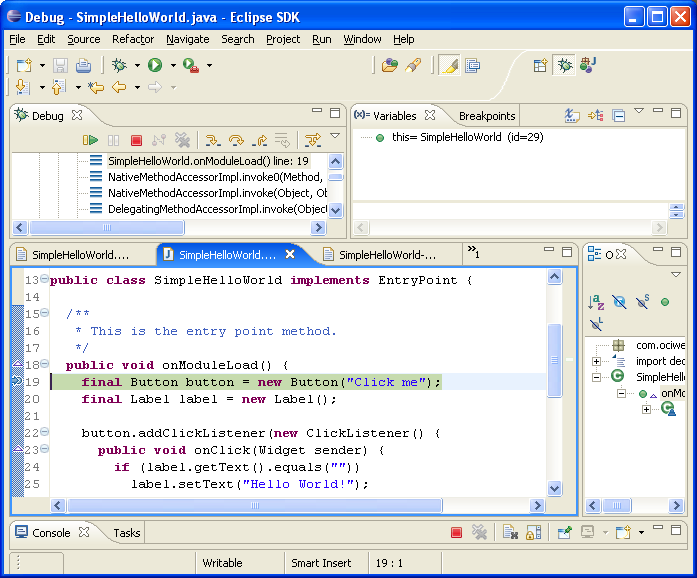
One of the key benefits of the GWT is debugging a user interface from within your IDE. To launch a debugging session in eclipse follow these steps:
- Open Debug... Add a Java Application configuration.
- Select the Main tab, set your Main class to:
com.google.gwt.dev.GWTShell. - Select the Classpath tab, click Advanced... Add Folders... select your source directory (this ensures the module is on the classpath)
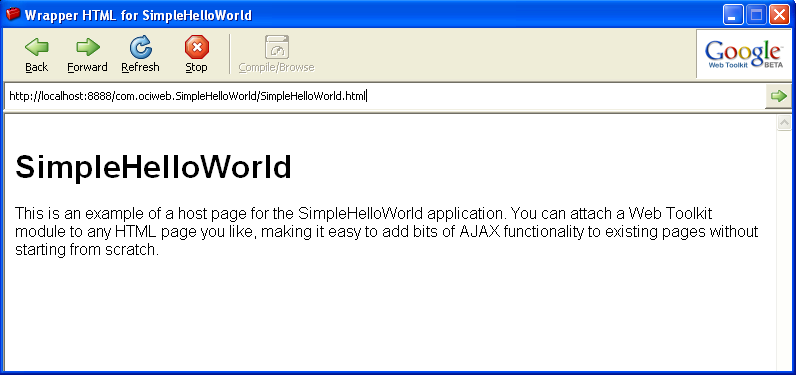
GWT's embedded browser:
Debugging client side code from my favorite IDE:
Creating Services
Loosely speaking, the GWT considers a service to be any server-side code that is invoked from a client. The GWT provides an RPC mechanism for asynchronous calls removing the need for direct access to the XMLHttpRequest Object, although access to this object is obtainable if desired. GWT accomplishes this through the use of a configuration file (moduleName.gwt.xml), two interfaces per service (synchronous and asynchronous) and a server-side implementation of the synchronous interface.
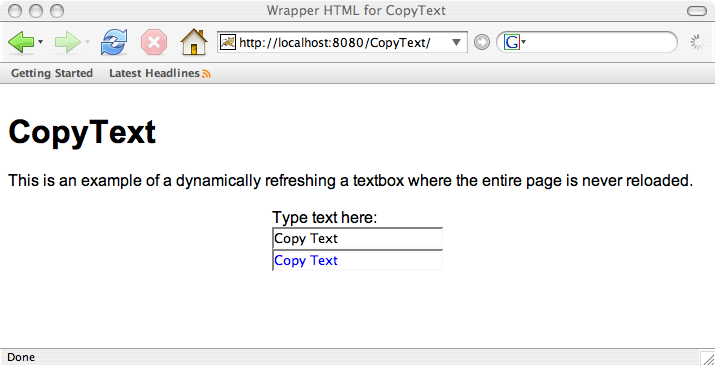
A simple example using a service
The user types in the top text box and the output from the service call is displayed in the textbox using blue characters - all without refreshing the page.
The directory structure for the service components looks like this:
- com.ociweb.CopyText.gwt.xml
- com.ociweb.client.CopyText.java
- com.ociweb.client.CopyTextAsync.java
- com.ociweb.server.CopyTextImpl.java
CopyText.gwt.xml:
- <module>
- <!-- Inherit the core Web Toolkit stuff -->
- <inherits name='com.google.gwt.user.User'></inherits>
-
- <!-- Specify the application entry point class. -->
- <entry-point class='com.ociweb.client.CopyText'></entry>
-
- <!-- The servlet implementation to map our service to. -->
- <servlet path='/copyTextService'
- class='com.ociweb.server.CopyTextServiceImpl'></servlet>
- </module>
For the RPC call to work, a few GWT constructs must be satisfied.
- The asynchronous interface must be named the same as the synchronous marker interface with the suffix of “Async” and both need to be located in the same package.
- The asynchronous method signature should correspond to the synchronous method with an extra parameter of type AsynchCallback and a return type of void.
- Additionally, the asynchronous interface is left unimplemented.
- The server-side implementation is typically located in the server package, although not necessarily, and extends
RemoteServiceServlet.
Synchronous interface — implemented by our service
- package com.ociweb.client;
-
- import com.google.gwt.user.client.rpc.RemoteService;
-
- public interface CopyTextService extends RemoteService {
- public String copyText(String s);
- }
Asynchronous interface — method signature similar to synchronous with additional
method parameter of type AsyncCallback and a return type of void
- package com.ociweb.client;
-
- import com.google.gwt.user.client.rpc.AsyncCallback;
-
- public interface CopyTextServiceAsync {
- public void copyText(String s, AsyncCallback callback);
- }
CopyTextServiceImpl is the service implementation. The RemoteServiceServlet is the base class for RPC service implementations and controls serialization of requests and responses. This implementation class returns the input string typed by the user.
- package com.ociweb.server;
-
- import com.google.gwt.user.client.rpc.IsSerializable;
- import com.google.gwt.user.server.rpc.RemoteServiceServlet;
- import com.ociweb.client.CopyTextService;
-
- public class CopyTextServiceImpl extends RemoteServiceServlet
- implements CopyTextService, IsSerializable {
-
- private static final long serialVersionUID = 1L;
-
- public String copyText(String s) {
- System.out.println("Text received:"+s);
- return s;
- }
- }
CopyText - This is the client code that gets converted into Javascript and hosts the call to the services as well as creating the user interface
package com.ociweb.client;

import com.google.gwt.core.client.EntryPoint;
import com.google.gwt.core.client.GWT;
import com.google.gwt.user.client.Window;
import com.google.gwt.user.client.rpc.AsyncCallback;
import com.google.gwt.user.client.rpc.ServiceDefTarget;
import com.google.gwt.user.client.ui.HTML;
import com.google.gwt.user.client.ui.KeyboardListener;
import com.google.gwt.user.client.ui.Label;
import com.google.gwt.user.client.ui.RootPanel;
import com.google.gwt.user.client.ui.TextBox;
import com.google.gwt.user.client.ui.VerticalPanel;
import com.google.gwt.user.client.ui.Widget;

    /*
     * Entry point classes define <code>onModuleLoad()</code>.
     */

public class CopyText implements EntryPoint {
    VerticalPanel vPanel;
    TextBox textResult;

    /*
     * This is the entry point method.
     */
    public void onModuleLoad() {
        final TextBox text = new TextBox();
        final Label label = new Label("Type text here:");
        textResult = new TextBox();
        //creating Async object using GWT.create() for callback
        final CopyTextServiceAsync copyTextService = (CopyTextServiceAsync)
                GWT.create(CopyTextService.class);

        //service entry entry point, which is defined in moduleName.gwt.xml
        ServiceDefTarget serviceTarget = (ServiceDefTarget) copyTextService;
        String myUrl = GWT.getModuleBaseURL()+"/copyTextService";
        serviceTarget.setServiceEntryPoint(myUrl);

        vPanel = new VerticalPanel();
        vPanel.add(label);
        vPanel.add(text);

        text.addKeyboardListener(new KeyboardListener() {
            public void onKeyDown(Widget sender, char keyCode, int modifiers) {
            }

            public void onKeyPress(Widget sender, char keyCode, int modifiers) {
            }

            public void onKeyUp(Widget sender, char keyCode, int modifiers) {
                copyTextService.copyText(((TextBox)sender).getText(),
                        getCopyTextServiceCallback());
            }
        });

        RootPanel.get("slot1").add(vPanel);
    }


    /* AsyncCallback is the primary interface that a user must
    * implement to receive a response from the remote procedure call.
    */
    public AsyncCallback getCopyTextServiceCallback() {
        return new AsyncCallback() {
            public void onFailure(Throwable ex) {
                RootPanel.get().add(new HTML(ex.toString()));
                Window.alert("The call failed.");
            }

            public void onSuccess(Object result) {
                //Added to support Internet Explorer and Mozilla -
                //Safari Worked fine without removing result first
                vPanel.remove(textResult);

                //call to external CSS file
                textResult.addStyleName("gwt-TextBox-blue");
                textResult.setText(result.toString());
                vPanel.add(textResult);
            }
        };

    }
}
Summary
The GWT has many benefits other than those previously mentioned, such as: JUnit integration, browser history management, the ability to plugin in custom Javascript (using the Javascript Native Interface), and of course a robust widget library to choose from when building a composite user interface. For these reasons, as well as, the RPC mechanism and code generation, GWT is worth a serious look when developing page-centric web applications such as Google does with its varied web applications.
There are however some problematic areas that any serious implementers should be aware of. The main issue is the non-open source licensing agreement. As a result, any bugs or featured enhancements will have to be fixed by an official GWT release. It's not hard to imagine how this could be a problem. A related issue is backward compatibility. As I've discovered over the course of writing this article, there are no guarantees that future releases will not break current code, nor is there much in the way of documentation letting you know what will break. This brings me to one final issue - the lack of official documentation. While there is some documentation available, it is largely scattered and lacking examples. To remedy this, I found the GWT user group very useful and to that end, the GWT developers are responsive to most if not all issues.
References
- [1] Google Web Toolkit
http://code.google.com/webtoolkit/ - [2] Google Web Toolkit Group
http://groups.google.com/group/Google-Web-Toolkit - [3] Cool GWT Widgets
http://gwt-widget.sourceforge.net/
