Custom GSP Tags, Grails' Best Kept Secret
By Dave Klein, OCI Software Engineer
December 2015
Introduction
Who knew? The Grails framework provides a powerful view layer with Groovy Server Pages (GSPs).
GSPs offer several advantages to Grails users. We cover some of those in this article.
At their most basic, GSPs are HTML pages containing embedded executable code. At runtime, Grails executes the code, replaces it with the results of the execution, and renders the resulting HTML.
You can embed code in a GSP using a few different mechanisms. For example, you can use scriptlets, like this:
<%  if (someCondition){
    out << "Some value"
    } else {
      out << "Some other value"
    }
%>
Unfortunately, putting code in your pages in this way can lead to complicated, unsafe, and ugly pages, not to mention a complete lack of invitations to social events.
You can also add executable code to GSPs using Groovy String interpolation.
<h3>Hello ${loggedInUser}</h3>This comes in handy, but using string interpolation for more than simple variable substitution can lead to many of the same problems as scriptlets.
GSP Tags
The technique you see used most often in Grails applications is GSP tags. These built-in tags handle most of your page customization needs.
Let’s take a look at a few of the more common uses.
set- The
settag is used to put a variable into scope in your page. For example, we use it to make a Grails service available to our page.
<g:set var="zipCodeService" bean="zipCodeService" ></g:set>The value assigned to var is what we will use elsewhere in our page. The value assigned to bean must be a Grails service or other Spring bean that is in the application’s context.
To set a non-bean value, use value instead of bean.
each- The
eachtag takes a collection and a variable name. It is a body tag and will render everything between its opening and closing tags, once for each item in the collection.
<g:each in="['Red', 'Yellow', 'Green']" var="color">
  <p>${color} is one of my favorite colors.</p>
</g:each>
Here the value of var will be the current item in the collection and is only in scope within the opening and closing tags.
if- When you have portions of a page that you want shown only under certain circumstances, the
iftag will do the trick. Theiftag is also a body tag, and the contents of the body are rendered only if the condition in the test argument is met.
<g:if test="${1 + 1 == 2}">
  <h1>Math still works!</h1>
</g:if>
Grails also provides a corresponding <g:else> tag. But it's best you use these tags with caution. Numerous conditional tags may be a sign of greater design weakness.
form- Grails also provides tags for HTML forms, beginning with a tag to define a form.
Let’s take a look at the <g:form> tag, along with a few of the input tags that are available.
<g:form controller="employee" action="save">
  FirstName: <g:textField name="fName" value="${emp.fName}" ></g:textField>
  LastName: <g:textField name="lName" value="${emp.lName}" ></g:textField>
  Active: <g:checkBox name="active" value="${emp.active}" ></g:checkBox>
  Department: <g:select name="dept" value="${emp.dept}"
            from="['Engineering', 'Sales', 'HR']" ></g:select>
  <g:submitButton name="submit" value="Save" ></g:submitButton>
</g:form>
The <g:form> tag allows us to use controller and action names to determine the submission URL. Notice that each of the input tags has a name attribute. The value assigned here will be available in the params object in the action.
link- No web app would be complete without some anchor tags. And if those anchors point to an action in your Grails app, then the
<g:link>tag is your friend.
<g:link controller="employee" action="profile" id="7">Jane Doe</g:link>You'll discover that Grails has many other tags, and still more can be found as part of plugins, but I’ll leave you to discover those on your own.
As powerful as these tags are, they are all designed to meet common needs. But what about the uncommon needs – the special circumstances that need to be managed in our applications? For these, we take advantage of one of my favorite Grails features, custom GSP tags.
Creating Custom GSP Tags
In a Grails application, custom tags exist in tag libraries.
A tag library is just a Groovy class, in the grails-app/taglib directory whose name ends in “TagLib”. You can create this class manually or using the Grails script.
> grails create-taglib demo.DemoThe Grails script creates a tag library class called DemoTagLib.groovy in the grails-app/taglib/demo directory, along with DemoTagLibSpec.groovy in src/test/groovy/demo. This last file contains a stubbed out Spock test that may be used to get your unit tests started.
The tag library class will look something like this:
package demo

class DemoTagLib {
    static defaultEncodeAs = [taglib:'html']

}
As you can see, our class does not extend any other classes or implement any interfaces. The unique behavior that it contains as a tag library is added by Grails, based on convention.
There is a line of code included in the generated class that would not necessarily be there if we created the class manually. This line, while important, is not necessary for the tag library to function. It is simply declaring that the output of the tags in this library will be HTML encoded for our peace of mind.
Now, let’s add a very simple tag to our library to get started. To declare a new tag, we just add a closure property to our class, like so:
def sayHi = {
    out << "Hello"
}
We would include this tag in a GSP with <g:sayHi />.
As you can see, we are writing using the left shift operator, the String ‘Hello’ to something called out. All tags have implicit variables, including the output stream of the response, which is called out.
A few of the other objects that are available are session, request, and response.
For this simple tag, our closure does not have any parameters. A tag closure can take up to two parameters. The first one will be a Map containing any attributes the tag may need. By convention, this is called attrs. Let’s add an attribute to our tag.
def sayHi = {attrs ->
    out << "Hello ${attrs.to}"
}
Here we’ve added the attrs parameter to our tag, and we expect users to include an attribute when they use our tag.
The attrs Map may contain any number of elements, and they may be of any type. Anything that is available to your GSP via the model can be passed as an attribute to a custom tag.
The second parameter that a tag may have is the body, which is a closure. The closure will contain all of the content that is between the opening and closing tags.
To render this content, we simply call the closure as we would a method.
def shout = {attrs, body ->
    out << body().toUpperCase()
}
Notice that we do not have any attributes for this tag, yet we still need to declare attrs.
The parameters to a tag closure are positional, so if we did not include our unused attrs, body would have been treated as a Map.
Calling Tags as Methods
Another cool feature of GSP tags is that they may be called as methods. This makes it easy for us to use the built-in GSP tags in our tags.
For example, let’s say that, given an employee object, we want to display the employee's name. If the employee is active, then that name should be a link to his or her detail page. If the employee is not active, we’ll just display the text.
We can reuse the tag to do this.
def empLink = {attrs ->
    def emp = attrs.employee
    def empName = "${emp?.fName} ${emp?.lName}"

    if (emp?.active){
        out << link(controller:'employee', action:'detail',
              id:emp.id){empName}
    } else {
        out << empName
    }
}
Let’s focus in on the following line:
out << link(controller:'employee', action:'detail', id:emp.id){empName}This is the equivalent of using the <g:link> tag like this:
<g:link controller="employee" action="detail" id="${emp?.id}">
    ${emp.fName} ${emp.lName}
</g:link>
We use the tag name as a method name. We replace the key=value pairs with a named parameter (key:value) structure, and we replace the body of the tag with a closure. Using this pattern, we can call any built-in or custom tag as a method.
Now, with this particular tag, there's a gotcha!
Remember that static property at the top of our class that declared the default encoding to be HTML? Well, that is going to cause our <g:empLink> tag to display something like this on our page:
<a href="/employee/show">Joe Jones</a>This is not exactly what we want our end users to see. To resolve this, we add another static property to let Grails know that this tag is an exception to the rule.
static encodeAsForTags = [empLink: [taglib:'none']]Now our tag will work as we would expect.
Namespaces
We can prevent ambiguity in tag names by using namespaces. The default namespace, ‘g’, is used for the built-in tags that come with Grails and for the tags we create. Generally speaking, when creating a custom tag library, we should declare a namespace for it.
To declare a namespace in our tag library, add the following static property to the DemoTagLib class.
static namespace = "demo"Now, to use any of the tags in our library, we prefix them with demo: instead of g: as we have been doing up until now.
When calling a tag as a method, we use the namespace as a prefix to the method call.
out << demo.sayHi(to:'Mary')Using MarkupBuilder
When creating a tag with a significant amount of HTML, Markup Builder can make our tag’s code more readable. Here’s an example of a tag that produces a table of employees.
def empList = {attrs ->
    def employees = attrs.employees
    def mb = new groovy.xml.MarkupBuilder(out)
    mb.table{
        tr{
    	    th{ mb.yield "Employee Name" }
            th{ mb.yield "Department" }
            th{ mb.yield "Active" }
        }
        employees.each{emp ->
            tr{
                td{mb.yield "${emp.fName} ${emp.lName}"}
                td{mb.yield "${emp.dept}"}
                td{mb.yield "${emp.active}"}
             }
        }
    }
}
MarkupBuilder provides a DSL that produces XML-based markup by treating tags as method calls and tag bodies as closures. Tag attributes, which our example is lacking, would be named parameters to the methods. Text that lies between tags is produced using MarkupBuilder.yield(). You can find more details about MarkupBuilder online at http://docs.groovy-lang.org.
Since this tag is also producing markup, we need to add it to our encoding exception. Let’s change the line towards the top of our tag library class to look like this:
static encodeAsForTags = [empLink: [taglib:'none'], empList: [taglib:'none']]Now, given a page with an employee list available to it, we can use a single line to get the following results.
<demo:empList employees="${employees}" ></demo:empList>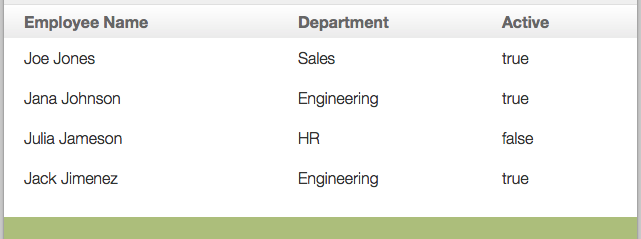
Testing Tags
Custom GSP tags are very easy to unit test. The default return value of a tag is a StreamCharBuffer, whose toString() method gives us a plain String. And since tags may be called as methods, testing may be as simple as calling the method and comparing the resulting String.
When we create a new tag library using the Grails create-tag-lib script, we get a stubbed-out test in src/test/groovy that looks something like this:
import grails.test.mixin.TestFor
import spock.lang.Specification

@TestFor(DemoTagLib)
class DemoTagLibSpec extends Specification {

    def setup() {
    }

    def cleanup() {
    }

    void "test something"() {
        expect:"fix me"
            true == false
    }
}
The @TestFor annotation sets up our test with a tagLib variable containing an instance of our tag library. Now we can call the tags in that library to test them.
Below is an example of testing the <demo:empLink> tag we created above.
@TestFor(DemoTagLib)
class DemoTagLibSpec extends Specification {

    def emp
    def setup() {
        emp = [id: 1, fName: 'Roger', lName: 'Rabbit']
    }

    void "test empLink Active"() {
        when:
            emp.active = true
        then:
            tagLib.empLink(employee:emp).toString() == '<a href="/employee/detail/1">Roger Rabbit</a>'

    }
}
In the setup() method, we create a mock Employee using a Map; then in our test we can call tagLib.empLink, passing that Map as the employee parameter, then compare the resulting String.
We can also test our tag in a way that mimics its use in a page. We do this by using the applyTemplate() method, like this:
void "test empLink Not Active"() {
    when:
        emp.active = false
    then:
        applyTemplate('<demo:empLink employee="${emp}" ></demo:empLink>', [emp:emp]) == 'Roger Rabbit'
}
The applyTemplate() method takes a String (which is an HTML snippet including our tag) and a Map (which serves as the model). If we have a tag that does not use model objects, we can skip that second parameter.
void "test sayHi"(){
    expect:
        applyTemplate('<demo:sayHi to="Sharon" ></demo:sayHi>') == "Hello Sharon"
}
Conclusion
We’ve shared here just a glimpse of Grails' custom tags, ranging from simple to slightly complex. We’ve also discussed some of the ways that custom tags can clean up our views.
Now it’s your turn. If you have a Grails application, take one of your largest GSPs and go through it looking for ways to consolidate and simplify it with custom GSP tags.
Software Engineering Tech Trends (SETT) is a regular publication featuring emerging trends in software engineering.
